|
Ingredients: 1 – antique wood door. Assorted paint, glitter, decor Wood Glue 12 - L-Brackets 48 - ½” screws 16 - narrow nails 8 - pieces of ¼” plywood, 1’x3’ (preferred size may vary) 8 - pieces of ¼” playwood, 1’x1’ (ibid) Optional: CitruStrip, Scraper/Sander Destructions: 1. Purchase antique wood door. There are many styles and flavors, so look at options as you’ll want one you really dig. It should feel like a friend.
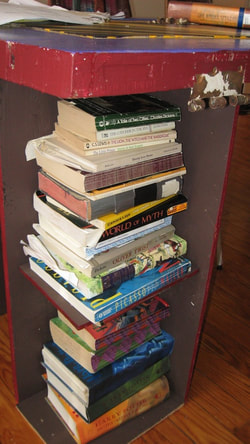
3. Legging You’ll want to build the legs first, then attach to the table. I made bookshelf legs (for cool extra storage) and went there hard, so that’s what I’ll describe: Take two of your 1’x3’ plywood pieces and glue/nail them together at the long sides, at a 90 degree angle. Glue first, then nail along the seam to reinforce. This forms a 3’ tall “L” shape. Repeat this so you have four 3’ tall “L” shapes. Add a base and shelves: Take one 1’x1’ plywood piece and attach it to the bottom of the “L”, between the two sides: glue it to both sides of the “L” and reinforce with several nails. Repeat for all legs. Do the same with a 2nd 1’x1’ piece, about half-way up the leg (i.e. about 1foot 6 inches from the bottom). Repeat with all legs. You now have one leg with a solid base, and a shelf halfway up. NOTE: You may want to do the base of each “L” at the same time you are making the “L” in the first place. Adding the base will help the “L” keep it’s shape/angle as the glue dries, and will make the leg easier to work with.  4. Connecting the Legs Lay the door on the floor, upside down (i.e. top surface against the floor). Space the legs out on the door where you’ll want them. Keep in mind you’ll want one leg towards each corner, but you’ll also want to make sure there’s room for people’s legs between table legs. Attach each leg to the table using 4 L-brackets per-leg at 90-degree angles. Once firmly attached, flip the table right-side up (you’ll want a partner for this!). You have a table! If you made bookshelf-legs, fill-em up! Have some friends over and cook some pork. Mine is pretty rad and works as a good work table/desk too. You can see more pics here. OPTIONAL/BONUS ROUND:
Between steps 1 – 2: Depending on the state of your door, you might need to clean it up a bit. I sanded and scraped using CitruStrip and lots of elbow grease, as I wanted to have the original wood showing through. If you plan to paint the entire piece, you can skip this (will save you lots of time and sweat). Panels for Insets: NOTE: Some old doors have inset panels, areas where the door isn’t flat but instead has a panel inset into the door at a lower level, often bordered by molding as part of décor. This can of course make table-fying the door difficult, as you likely don’t want a table with divots. Two suggestions: 1. Once finished decorating, cover the entire table with plexi-glass which protects the decoration and also gives you an entirely flat surface upon which to table 2. This is what I did: cut thin luan to fit the insets and glued those into place, making the table one level surface throughout. This worked very well for me as the 4 added/glued-in panels became new places where I could add interesting splashes of color. Lastly... Take "Before" Pictures. Because your blog will look much cooler that way.
1 Comment
Leave a Reply. |

